LiminalMask
SOC-12
Hi everyone. Recently I've become re-interested in Traveller and in particular, mapping & design. There's a lot of options out there, and after some experimentation I got myself LunarCell and Campaign Cartographer 3 to generate my Traveller maps.
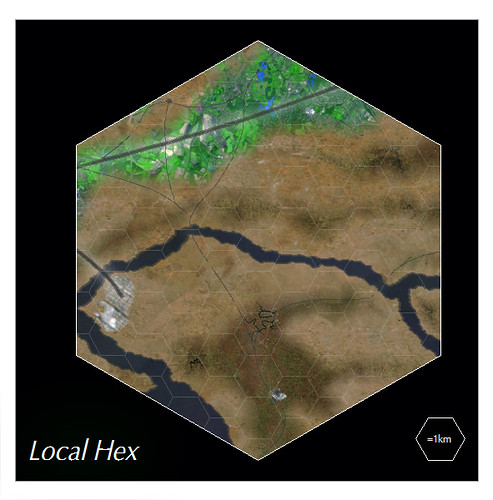
Well, the thing is, "drilling down" with these tools can be a bit difficult, confusing, and frustrating. Not to mention doing maps at all, let along moving from World Hex to Terrain Hex to Local Hex.
So, after some experimentation, I think I found a way that works for me. I thought I would share this information with this forum for any who may want to try their hand at it, but are finding things difficult.
I should say in advance I'm not an expert in these programs. I'm sure there are better or more efficient ways to do things than I will show you. And there are some limitations, I'm sure, too. But what I have here is a start that others might find useful. I welcome comments or suggestions for how to improve this process. Also, much of what I show here was shown to me by others on this board and elsewhere. I take no special credit for this process, just share what I have learned, organized into one place.
Making the Planet
I like LunarCell to make my planets. I got Fractal Terrains with CC3 but LunarCell's planets are just more beautiful IMO. Plus LunarCell is a plug in for Photoshop, PSPro, GIMP, etc. So, let's make a planet. I give you the system Ixamplar, B-768622-9.
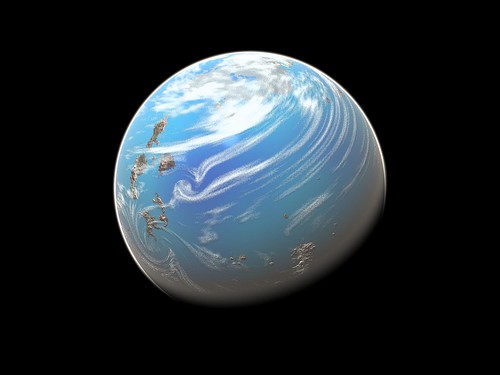
I save this view to make player handouts. But we need to convert this sphere into a isocohedron. Fortunately LunarCell and the other addon Flexify, will do this for us. From the LunarCell window, render the planet in "Map Color."

Now, run Flexify, and set it to convert from "equirectangular" to "isomap".
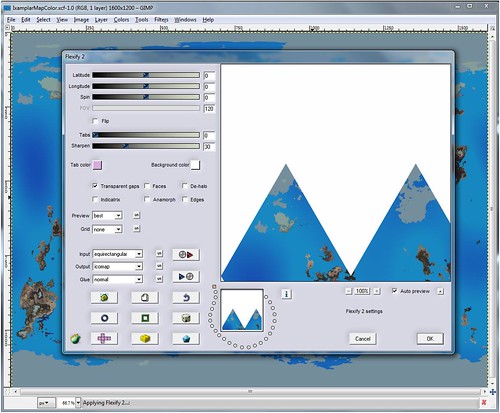
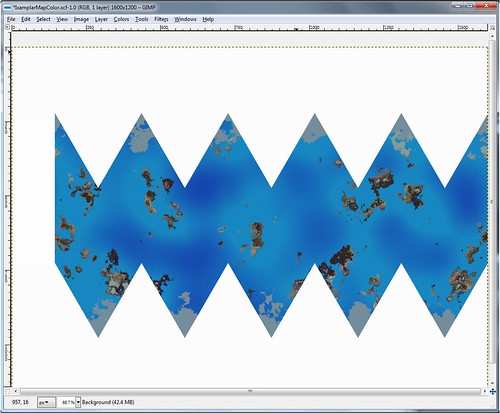
And here are the results:

You may notice, however, that this isomap does not match Traveller standard, which has two half-triangles at the top of each side. So, using your graphics program, do a little surgery. Cut off the left hand triangle and paste it on the other side. I find I can never quite get it to match EXACTLY, so to minimize the appearance of a line or seam, put the triangle on its own layer and set it to Multiply.
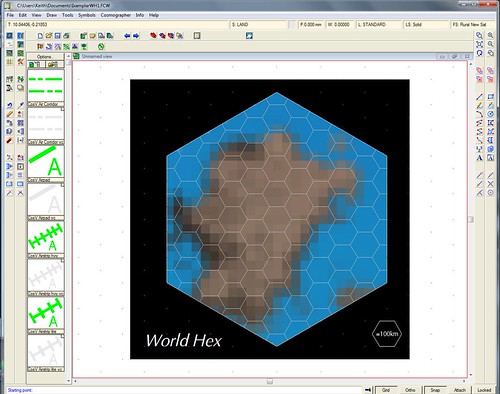
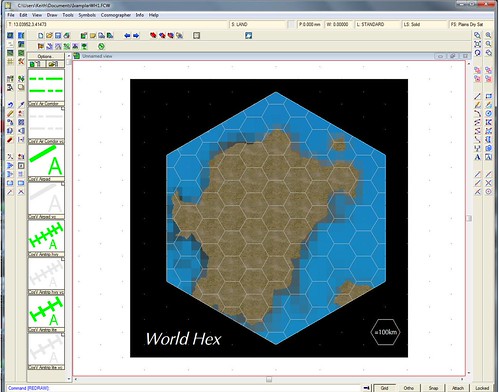
And so we have a Traveller-standard Isomap. Now, let's put it on a Hex map. Most graphic programs will open PDF files, so whether you're using the T5 maps or one of the older ones, you can load it into your program. Like so:

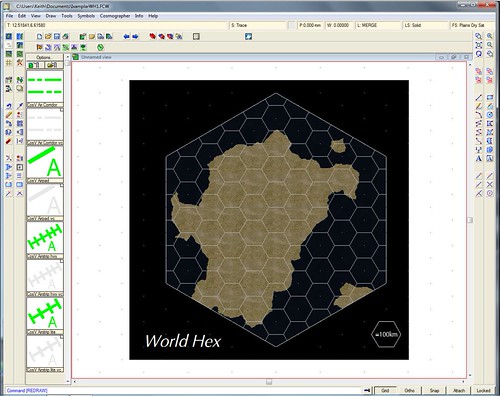
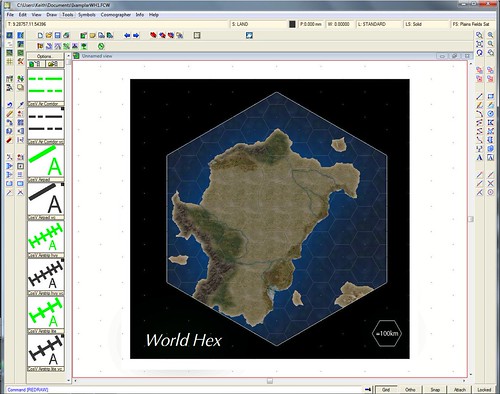
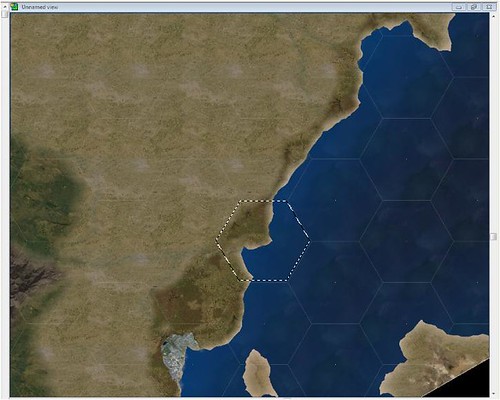
Then it's a matter of copying the isomap and pasting it onto the hex grid. Before you do this, use your selection box to measure the size of your hex grid from corner to corner. (You can see the dotted line where I did this in the image above.) Then when you paste in the isomap, resize it to that same size. It should fit the hex map nearly perfectly. Make the isomap its own layer, set it to Multiply, and voila, the hex grid shows through. Add other pertinent info and you have a world map ready to go.

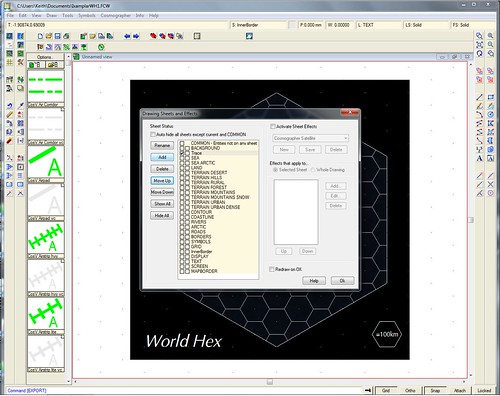
Now, though, comes the tricky part. The 'drilling down'. This is where you'll need to go into CC3, which can be a difficult program to use. However, on ProFantasy's website they have a series of video tutorials that help a lot. Ultimately, for my drilling down, I had to design my own template maps to suit my personal tastes/needs. This wasn't too hard to do with some experimentation: 11x11 hex grid with another border layer. You can make your own maps to suit, or if there's enough desire, maybe I can find some place to host them and make them available. Here's what one looks like:
To begin the drilling down procedure, select the hex in your Isomap view that you want to drill down on. I selected a largish island in the leftmost whole triangle, near the lower Tropic line. Use your lasso or similar selection tools to copy it into its own file and save it as a .bmp file. (This is because CC3 will import .bmps, but not many other formats.) It will be small, but that's okay.
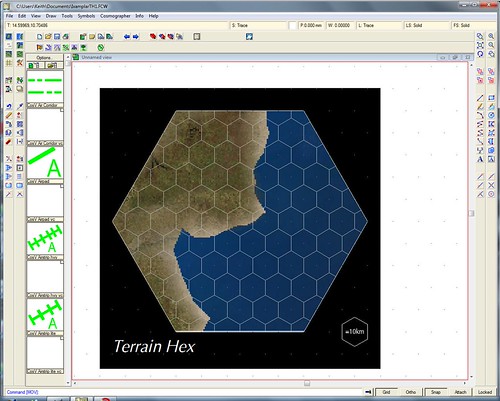
The next step is to use that .bmp as pattern you will trace over in CC3. To begin, make a new sheet and layer in CC3 that is for that .bmp. I call mine "Trace." You will then want to move it up on the Sheet list to almost the top, one spot after the Background. This will allow everything except the black background to be drawn atop it.
Once done, make sure you have this Trace sheet/layer selected, and then Import the File into CC3. Use the "Draw" menu. This took me some time to figure out how to do, so I include a shot of where to find this menu option here.

(Continued in next post.)
Well, the thing is, "drilling down" with these tools can be a bit difficult, confusing, and frustrating. Not to mention doing maps at all, let along moving from World Hex to Terrain Hex to Local Hex.
So, after some experimentation, I think I found a way that works for me. I thought I would share this information with this forum for any who may want to try their hand at it, but are finding things difficult.
I should say in advance I'm not an expert in these programs. I'm sure there are better or more efficient ways to do things than I will show you. And there are some limitations, I'm sure, too. But what I have here is a start that others might find useful. I welcome comments or suggestions for how to improve this process. Also, much of what I show here was shown to me by others on this board and elsewhere. I take no special credit for this process, just share what I have learned, organized into one place.
Making the Planet
I like LunarCell to make my planets. I got Fractal Terrains with CC3 but LunarCell's planets are just more beautiful IMO. Plus LunarCell is a plug in for Photoshop, PSPro, GIMP, etc. So, let's make a planet. I give you the system Ixamplar, B-768622-9.
I save this view to make player handouts. But we need to convert this sphere into a isocohedron. Fortunately LunarCell and the other addon Flexify, will do this for us. From the LunarCell window, render the planet in "Map Color."
Now, run Flexify, and set it to convert from "equirectangular" to "isomap".
And here are the results:
You may notice, however, that this isomap does not match Traveller standard, which has two half-triangles at the top of each side. So, using your graphics program, do a little surgery. Cut off the left hand triangle and paste it on the other side. I find I can never quite get it to match EXACTLY, so to minimize the appearance of a line or seam, put the triangle on its own layer and set it to Multiply.
And so we have a Traveller-standard Isomap. Now, let's put it on a Hex map. Most graphic programs will open PDF files, so whether you're using the T5 maps or one of the older ones, you can load it into your program. Like so:
Then it's a matter of copying the isomap and pasting it onto the hex grid. Before you do this, use your selection box to measure the size of your hex grid from corner to corner. (You can see the dotted line where I did this in the image above.) Then when you paste in the isomap, resize it to that same size. It should fit the hex map nearly perfectly. Make the isomap its own layer, set it to Multiply, and voila, the hex grid shows through. Add other pertinent info and you have a world map ready to go.
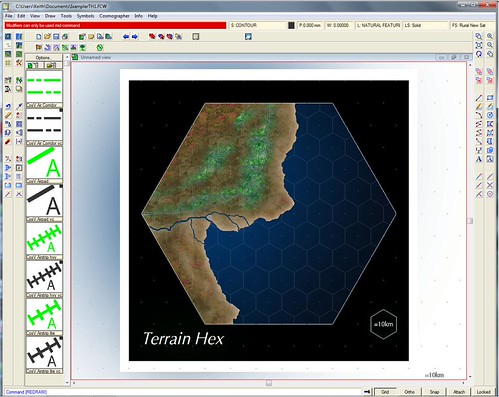
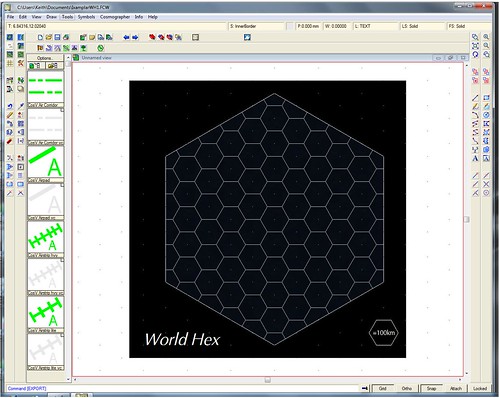
Now, though, comes the tricky part. The 'drilling down'. This is where you'll need to go into CC3, which can be a difficult program to use. However, on ProFantasy's website they have a series of video tutorials that help a lot. Ultimately, for my drilling down, I had to design my own template maps to suit my personal tastes/needs. This wasn't too hard to do with some experimentation: 11x11 hex grid with another border layer. You can make your own maps to suit, or if there's enough desire, maybe I can find some place to host them and make them available. Here's what one looks like:
To begin the drilling down procedure, select the hex in your Isomap view that you want to drill down on. I selected a largish island in the leftmost whole triangle, near the lower Tropic line. Use your lasso or similar selection tools to copy it into its own file and save it as a .bmp file. (This is because CC3 will import .bmps, but not many other formats.) It will be small, but that's okay.
The next step is to use that .bmp as pattern you will trace over in CC3. To begin, make a new sheet and layer in CC3 that is for that .bmp. I call mine "Trace." You will then want to move it up on the Sheet list to almost the top, one spot after the Background. This will allow everything except the black background to be drawn atop it.
Once done, make sure you have this Trace sheet/layer selected, and then Import the File into CC3. Use the "Draw" menu. This took me some time to figure out how to do, so I include a shot of where to find this menu option here.
(Continued in next post.)